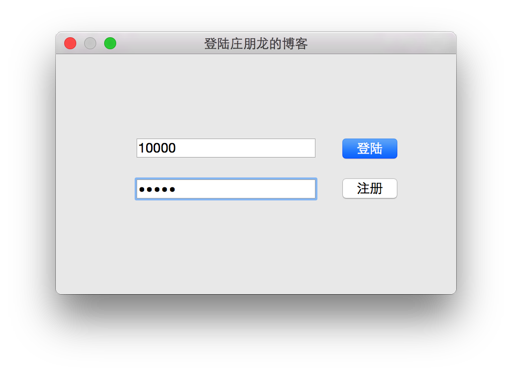
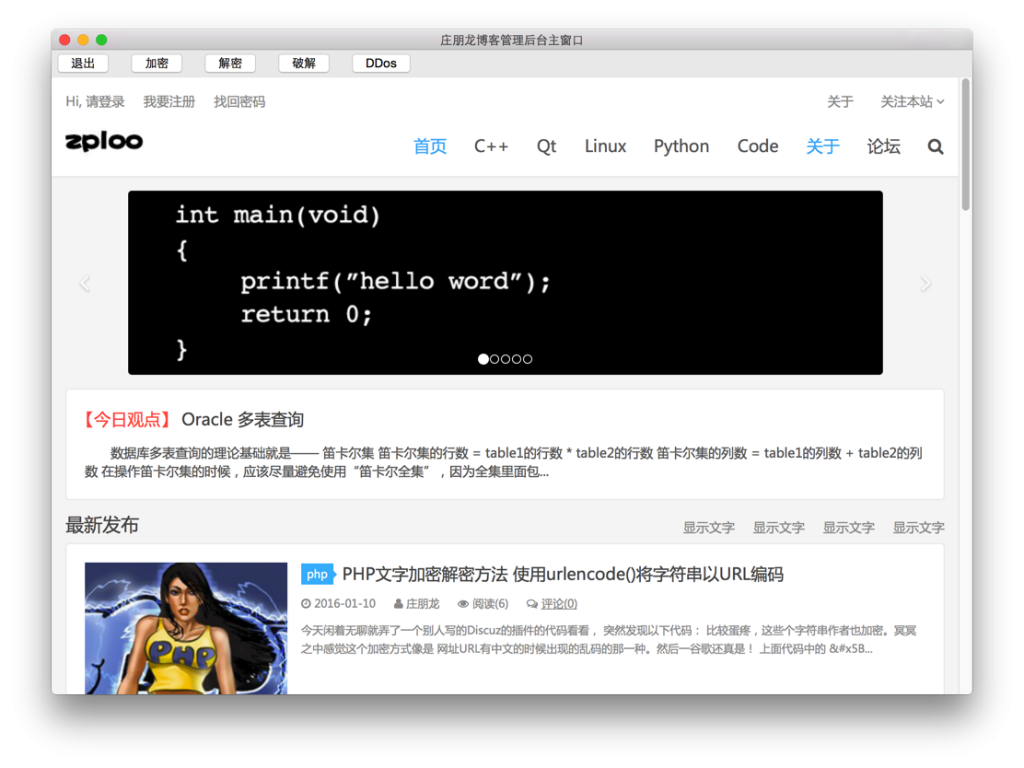
我也是刚接触Qt 今天练练手,为了巩固对Qt的理解 我这次不使用qt里可视化的ui文件做登陆框,全部都是自己手敲代码,自己调整按钮、窗口位置 。
这是登陆框界面:
这是登陆后的页面:
登陆后的界面是我博客的首页 使用 QWebView 类里的load函数引入的 就像HTML里的 <iframe> 标签一样,第二个窗口上面的四个按钮 我就实现了第一个 “退出”功能,点击退出后就会 回到登陆框。其他几个按钮纯属是装B 大家可以无视了
还是老样子,我也不写什么语法,某个成员函数应该怎么用了。直接看代码吧,代码里有详细的注释:
#include "dialog.h"
#include <QPushButton>
#include <qlineedit.h>
#include <QDebug>
#include <QMessageBox>

Dialog::Dialog(QWidget *parent)
    : QDialog(parent)
{
    this->setWindowTitle("登陆庄朋龙的博客");
    denglu.setParent(this);
    denglu.setText("登陆");
    denglu.move(280,80);
    connect(&denglu, &QPushButton::released, this, &Dialog::login);
    zhuce.setParent(this);
    zhuce.setText("注册");
    zhuce.move(280, 120);
    QIntValidator v( 0, 999999, this );
    userid.setValidator( &v ); //只接受从0到999999的整数
    userid.setParent(this);
    userid.resize(180, 20);
    userid.move(80, 84);
    connect(&userid, &QLineEdit::returnPressed, this, &Dialog::login);

    //使用一个函数指针指向IndexWindows的fanhui 信号的
    void (IndexWindows::*psignal)() = &IndexWindows::fanhui;

    //当前基类 如何收到 psignal 信号 就执行fanhui成员函数
    connect(&index, psignal, this, &Dialog::fanhui);
    passwd.setParent(this);
    passwd.resize(180, 20);
    passwd.move(80, 125);
    // 设置密码显示风格
    passwd.setEchoMode(QLineEdit::Password);
    this->resize(400,240);
}
Dialog::~Dialog()
{

}

void Dialog::login()
{
    QString uid = userid.text();
    QString pass = passwd.text();

    if(i == 5) {
           //首先判断错误次数时候达到上限,如果错误次数已经达到上限 就不再验证账号 密码是否正确 直接退出
           QMessageBox::about(this, "about", "错误次数已经达到上限, 已经被禁止登陆,请联系管理员解封");
    } else if(uid=="10000"&&pass=="zploo"){
        //如果错误次数没有没有达到上限 就验证

        //调式输出没别的用处 可以注释掉
        qDebug() << "账号是:" << uid <<" 密码是:" << pass;

        //登陆成功 切换到主界面
        index.show();
        this->hide();
    } else {
        //账号密码出错提示  并将计数器 + 1
        i++;
        QMessageBox::about(this, "passerror", "您输入的账号或密码错误,请重试...(注意大小写)");
    }
}

void Dialog::fanhui()
{
    //隐藏index窗口
    index.hide();
    //显示自身
    show();
}
为了能充分理解qt的信号和槽的机制,我在第二个界面添加了退出按钮,具体代码如下:
#include "indexwindows.h"
#include <QtWebKitWidgets/QWebView>

IndexWindows::IndexWindows(QWidget *parent) : QWidget(parent)
{
    this->setWindowTitle("庄朋龙博客管理后台主窗口");
    resize(1000, 700);
    outlogin.setParent(this);  //指定父类
    outlogin.setText("退出");
    connect(&outlogin, &QPushButton::clicked, this, &IndexWindows::sendSlot);  //如果outlogin按钮被按下 就只执行 sendSlot 这个成员函数

    Button1.setParent(this);
    Button2.setParent(this);
    Button3.setParent(this);
    Button4.setParent(this);

    Button1.setText("加密");
    Button1.move(80,0);

    Button2.setText("解密");
    Button2.move(160,0);

    Button3.setText("破解");
    Button3.move(240,0);

    Button4.setText("DDos");
    Button4.move(320,0);

    QWebView *view = new QWebView(this);
    view->load(QUrl("http://www.zhuangpenglong.com/"));
    view->show();
    view->move(0,30);
    view->resize(1000, 670);
}

void IndexWindows::sendSlot()
{
    emit fanhui();    //发射fanhui 信号
}
由于我在第二个窗口使用了QWebView 类里的load成员函数, 所有要在qt项目文件里的 .pro 添加上下面这一行,否则会提示找不到相应的函数
QT += webkit webkitwidgets network
需要完整项目源码的朋友可以点击这里下载:Qt做的登陆框


